3D Objects: Plans and Elevations
Year 12 Mathematics Essential WA Curriculum WACE 3.2.9, 3.2.10, 3.2.11 Understanding 3D shapes through 2D views
Learning Objectives
Interpret plans and elevation views of 3D models Sketch elevation views from given 3D objects Understand the relationship between 3D objects and their 2D projections Apply knowledge to real-world workplace scenarios
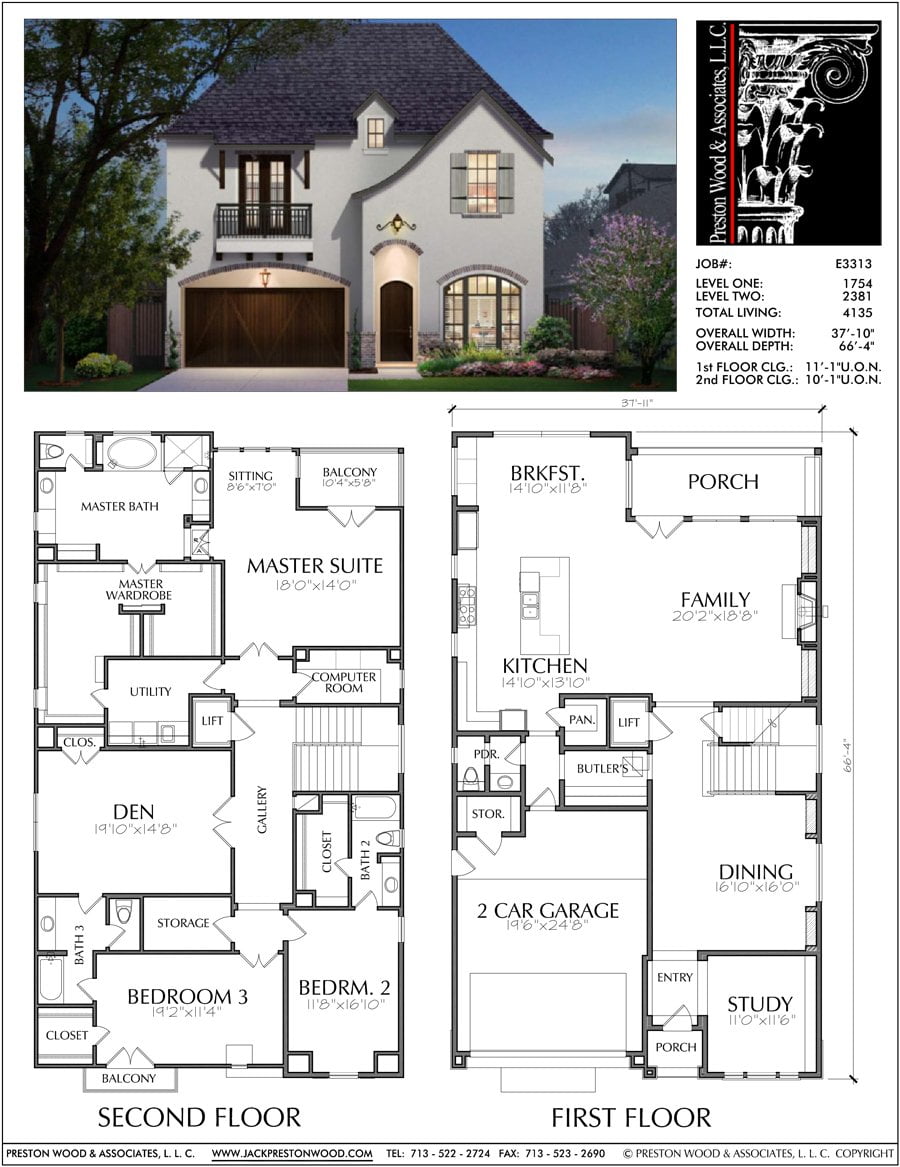
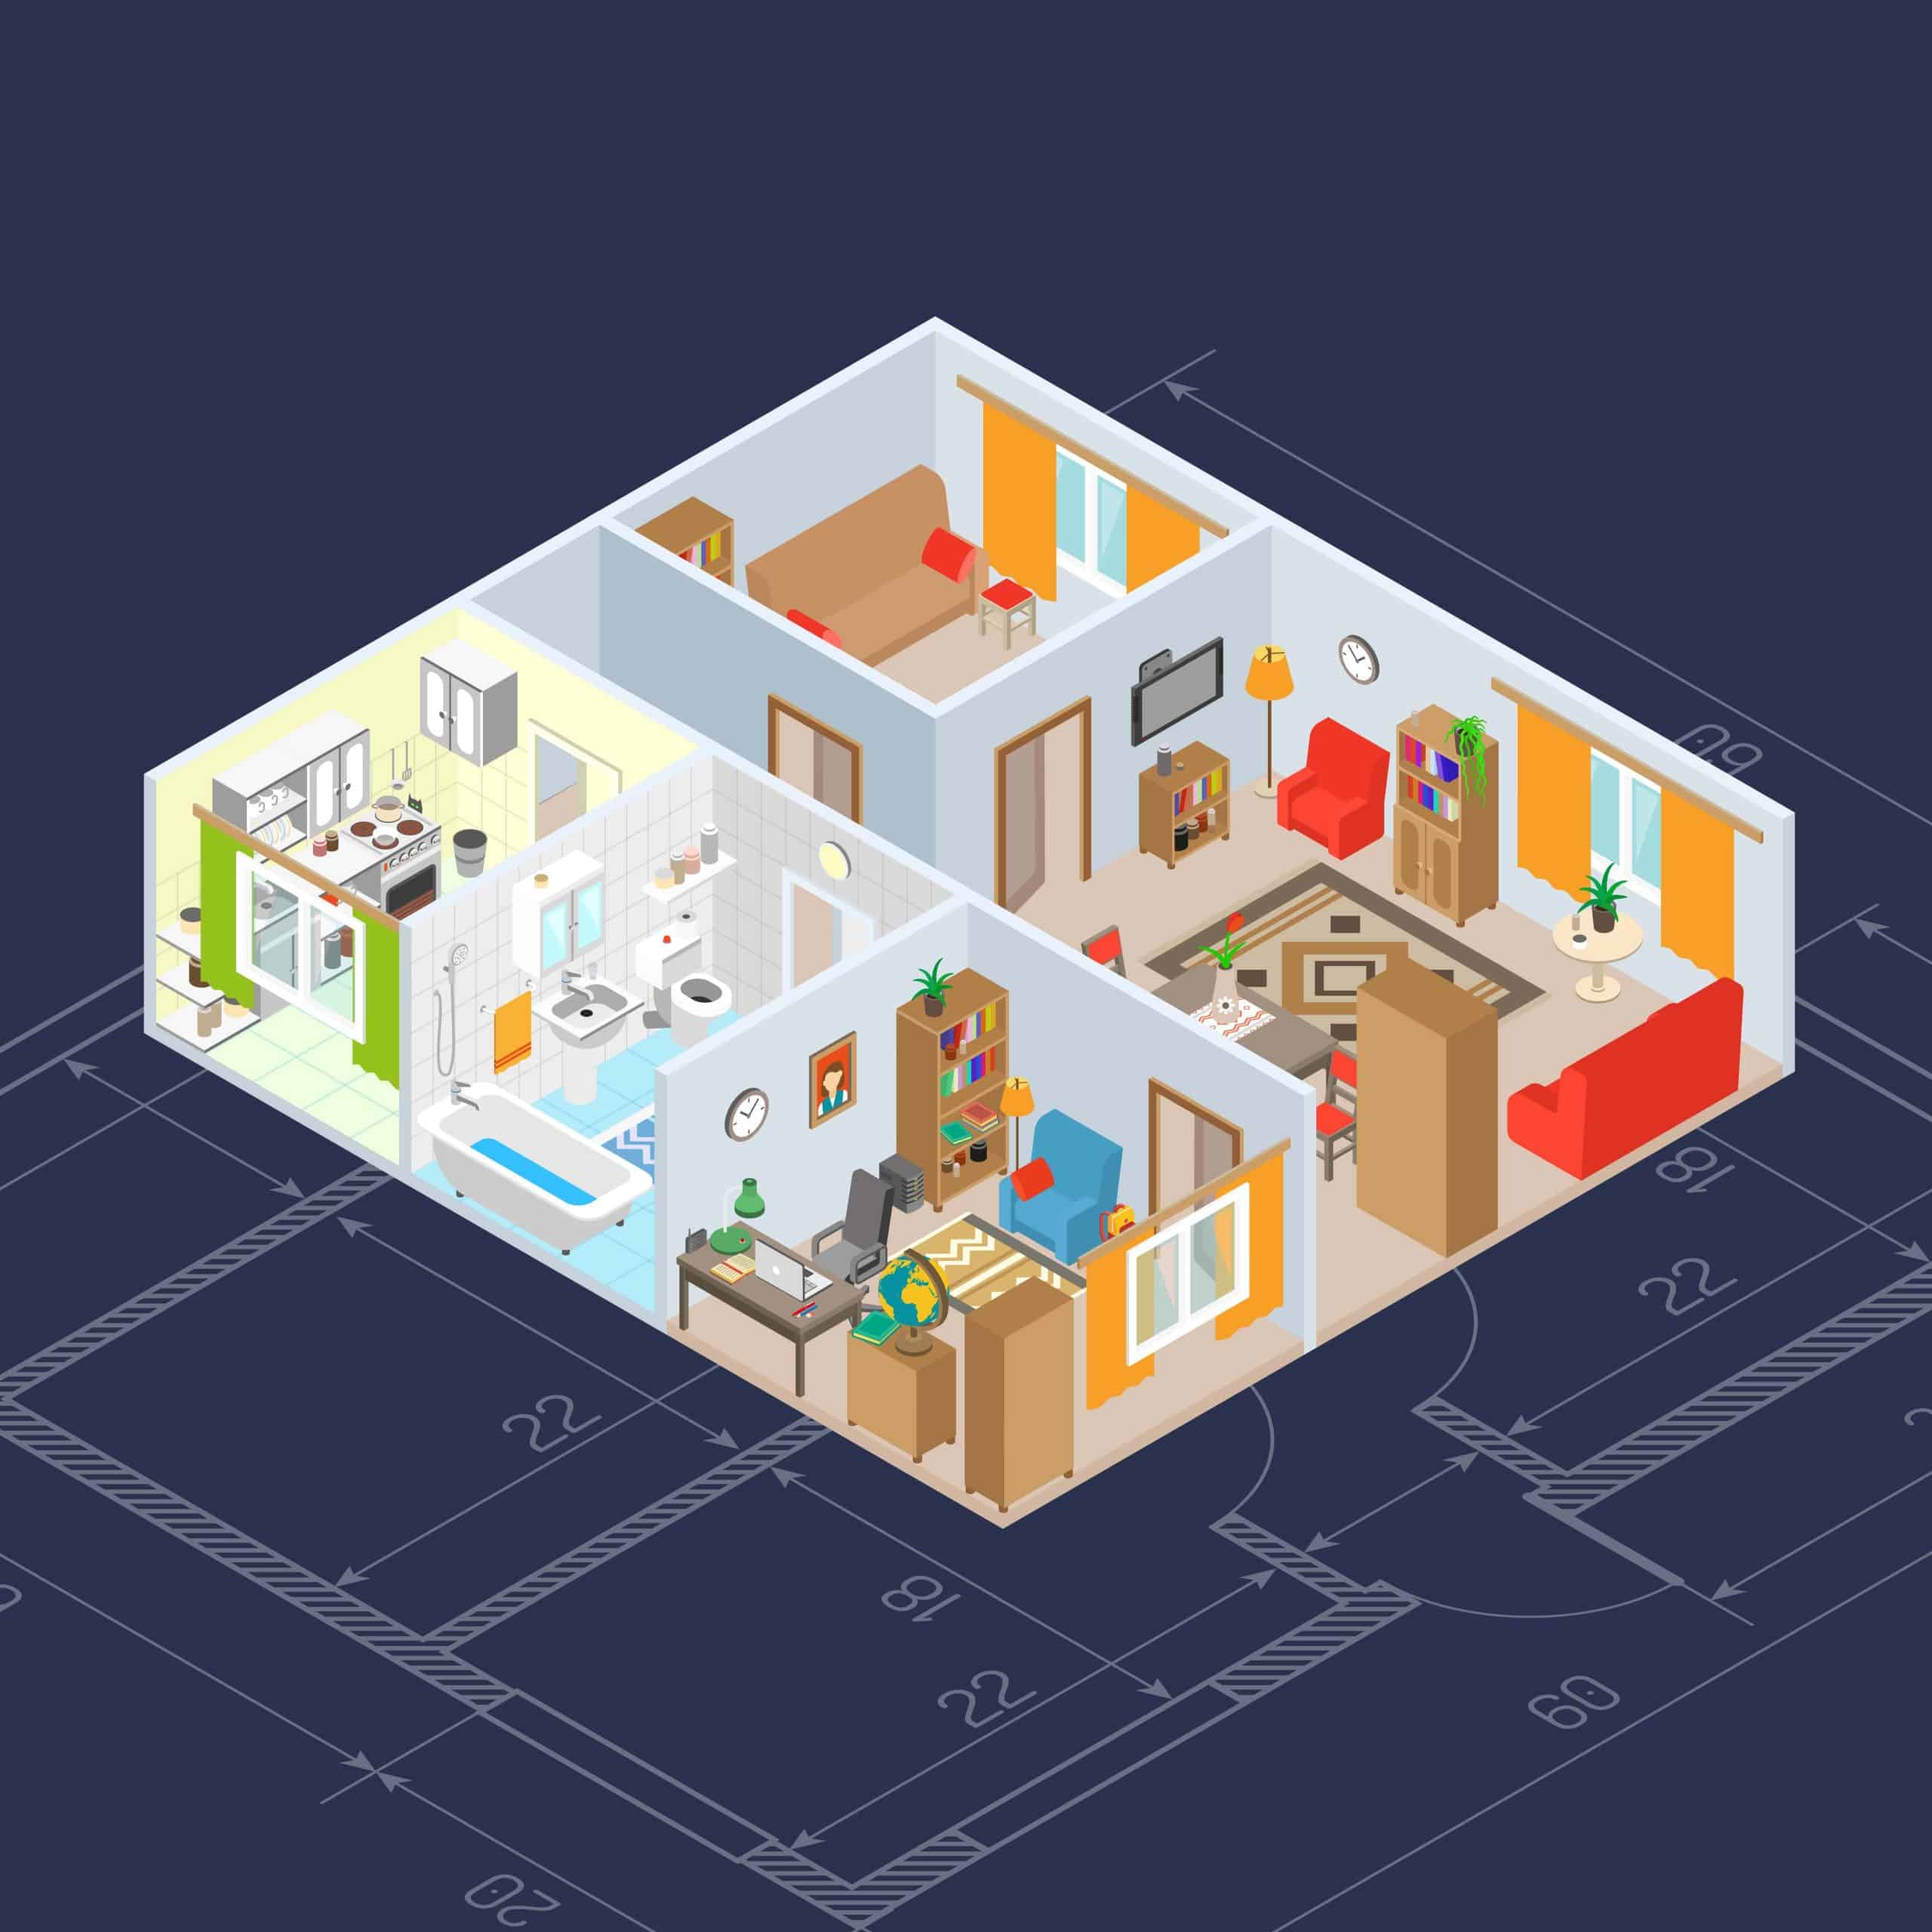
What are Plans and Elevations?
Plan view: Looking down from above (bird's eye view) Front elevation: Looking at the front face Side elevation: Looking from the side These are orthographic projections of 3D objects
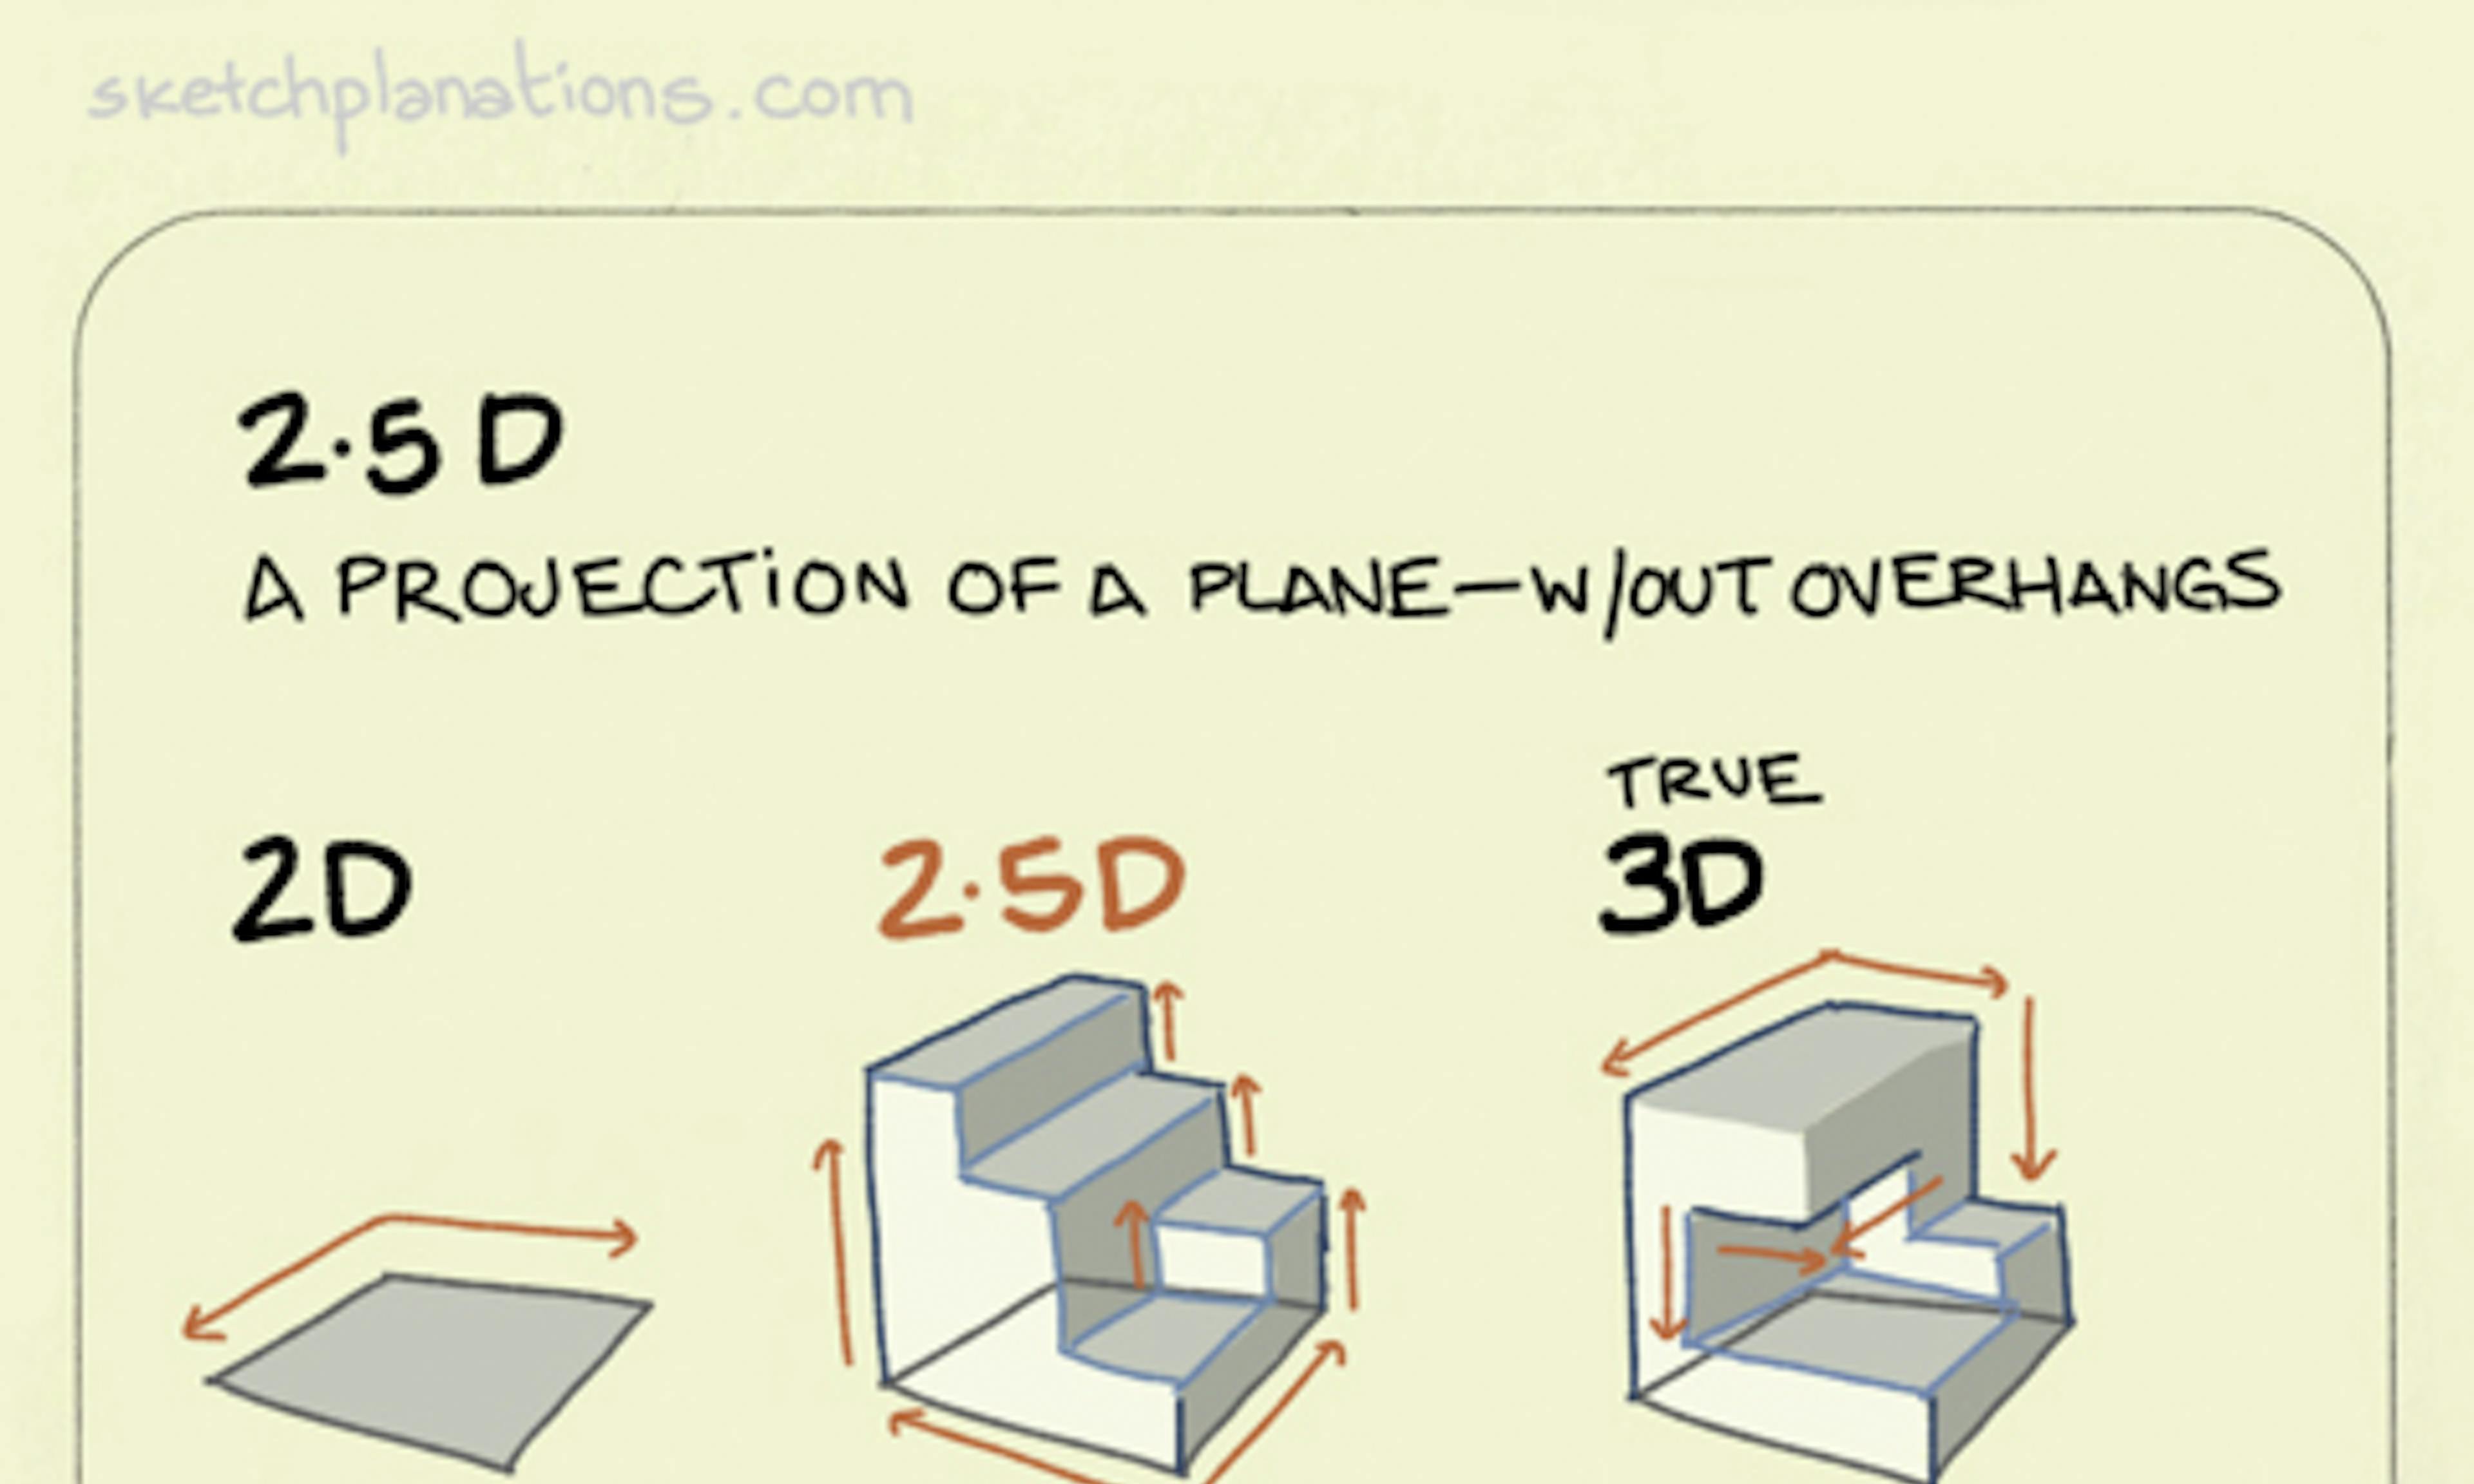
Orthographic Projection System

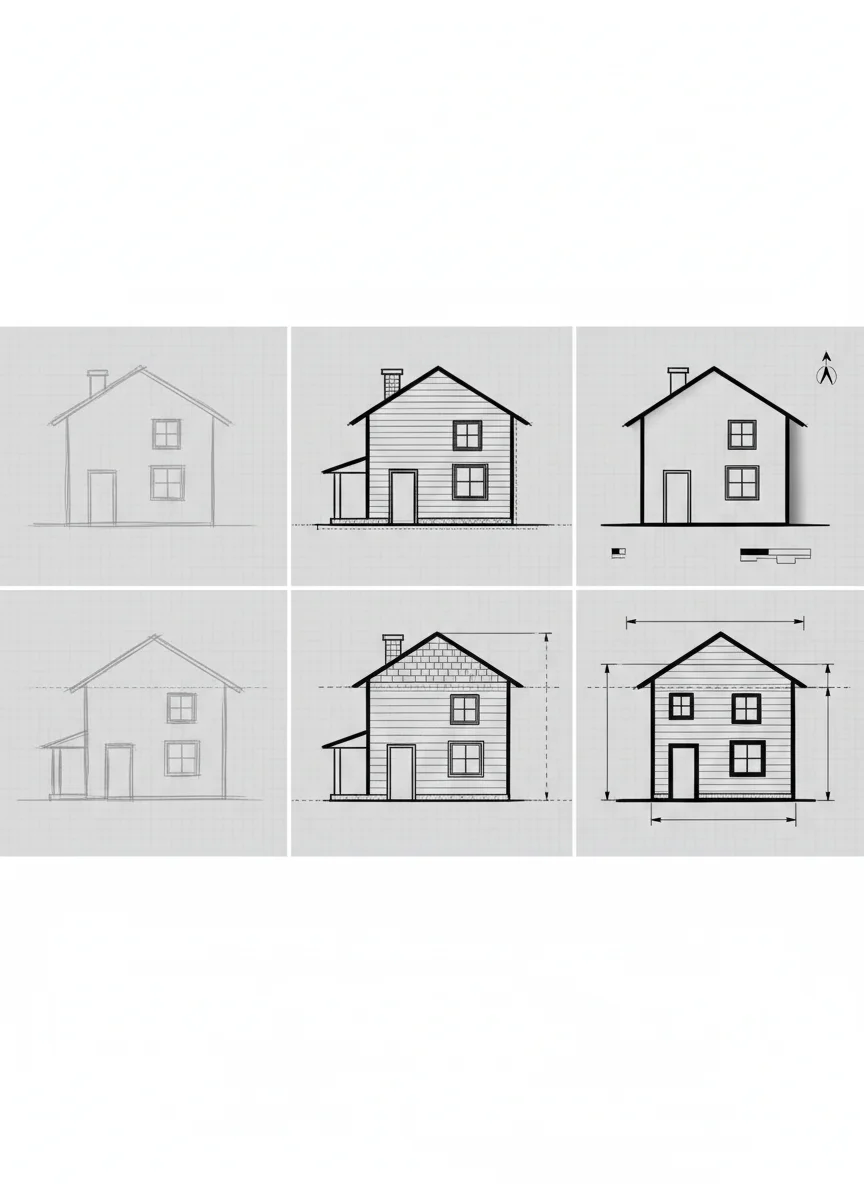
I Do: Analyzing a Simple Building
Teacher demonstrates with a rectangular building model Identify the plan view (roof outline) Draw the front elevation (main entrance view) Draw the side elevation (profile view)

Key Terminology
Orthographic projection: 2D representation of 3D objects Hidden lines: Dashed lines showing edges not visible Visible lines: Solid lines for edges you can see Dimensions: Measurements shown on drawings

Real-World Applications
{"left":"Architecture: Building plans for construction\nEngineering: Machine part specifications\nManufacturing: Product assembly instructions","right":"Workplace: Reading technical drawings\nPersonal: Furniture assembly guides\nCommunity: Understanding building permits"}

We Do: L-Shaped Building
Work together to analyze an L-shaped structure Students help identify each view Draw plan view showing the L-shape from above Sketch front and side elevations together

Quick Check: What view is this?
Look at the diagram on the board Is this a plan view, front elevation, or side elevation? What clues help you identify the view type? Discuss with a partner
Step-by-Step Drawing Process
1. Identify the object's main features 2. Choose your viewing direction 3. Draw only what you can see from that angle 4. Use solid lines for visible edges 5. Add dashed lines for hidden features 6. Include dimensions if required

You Do: Independent Practice
Choose one of the 3D models provided Draw the plan view on your worksheet Draw the front elevation Draw the side elevation Compare with a classmate

Common Mistakes to Avoid
Forgetting to show hidden lines with dashes Drawing perspective instead of orthographic views Incorrect proportions between views Missing important structural details Not aligning views properly
3 more slides available after you open the deck.
Download all 15 slides